Devon TRF Group Forum
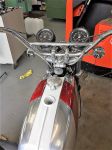
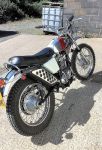
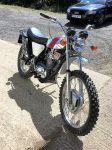
Members Login
Username 
 
Password 
    Remember Me  
Post Info TOPIC: Rebuilding a 1972 BSA B25T Victor Trail


Clubman A

Status: Offline
Posts: 687
Date:
Rebuilding a 1972 BSA B25T Victor Trail


Having recently rebuilt a 1972 BSA B25T Victor Trail bike I thought I'd share a few picture of the rebuild.

I originally bought the bike in bits over 16 years ago and it was a right mixture of incorrect and missing parts. It came with the wrong steel fuel tank as the Trail models were fitted with a really nice aluminium tank that's a centerpiece of the bike. Problem is finding one and in good condition in the end I found a rather worse for wear one on ebay.

20150809_130755.jpg

With the paint removed you can see just how bad shape it was in.

20150810_105557.jpg

I sent a series of pictures off to three businesses that undertake tank dent removal, in the end only one came back with a quote which was this COMPANY the guy who does this is a genius especially when you consider that most if not all of the dents are removed all through the filler cap!! You'll see the tank later on when it;s fitted.

The wheels were not in a good shape so were stripped down.

20151028_195651.jpg

20151028_202302.jpg

Cleaned & painted.

20170512_075625.jpg


Attachments
__________________

was it turn left or was it right...ahhhhh


Clubman A

Status: Offline
Posts: 687
Date:

Next up were the forks, fortunately the forks the bike came with had new stanchions so it was straightforward rebuild with new seals and some progressive fork springs that are readily available.

20170114_184636.jpg

20170114_190125.jpg

This bike was launched in 1971 and the frame had a very good pedigree as it was based on the Mkiv BSA works MX frame so it came with what were advanced features for its day with taper roller steering head bearings and needle rollers in the swinging arm with eccentric adjusters for chain tension on the swinging arm pivot.

20170121_122744.jpg

I drilled and fitted a grease nipple to the swinging arm as the later bikes had this, it's important that the seals are fitted with the lip facing out as this allows the old grease an escape route otherwise the seals get pressurised and the old grease can't get out.

20170121_125812.jpg

New steering bearings fitted.

20170526_102334.jpg


Attachments
__________________

was it turn left or was it right...ahhhhh


Expert

Status: Offline
Posts: 1397
Date:

Nice start to a rebuild ..
Mike

__________________


Clubman A

Status: Offline
Posts: 533
Date:

Hi John,

I've got a 1961 BSA trials bike that I've just finished a minor restoration on; nothing like as in-depth as yours though.

Mine is a C15T engine (bored out to 290cc) in a B40 frame. It was common at the time to build them this way as it was the most competitive set up.

We'll have to get them together sometime - an Exmoor LAF meeting on the bikes maybe??

cheers
Colin B


-- Edited by cee-b on Monday 9th of October 2017 07:27:29 PM


-- Edited by cee-b on Monday 9th of October 2017 08:24:17 PM

__________________


Champion

Status: Offline
Posts: 4629
Date:

Let me know when and I come along on the Norton!

__________________

Don't trust atoms, they make up everything! 


Expert

Status: Offline
Posts: 1366
Date:

popcorn.gif


__________________

DGTRF Rights Of Way/Rights Of Roads Officer


Clubman A

Status: Offline
Posts: 687
Date:

Sounds like a really good idea Colin & Dan smilesmilesmile

Now onto the engine.

One area that there's been huge improvements since this bike was made is with the quality of the valves and guides, so with  this one I'm trying out some Black Diamond stainless steel valves with titanium valve spring caps from Kibblewhite engineering in the USA. The valve guides are unique to this model year so I made some from Colisbro Bronze and also fitted a seal on the inlet.

20170301_181228.jpg

New Guides fitted

.20170610_103828.jpg

Seats recut

20170608_203753.jpg

And All finally fitted

20170610_110439.jpg


Attachments
__________________

was it turn left or was it right...ahhhhh


Champion

Status: Offline
Posts: 4629
Date:

Somewhat jealous of your facilities John! I've fitted an austenitic exhaust valve in the Norton too, they tend to glow red apparently when the engine works hard! 


-- Edited by devondan on Tuesday 10th of October 2017 07:38:59 AM

__________________

Don't trust atoms, they make up everything! 

pug


Clubman B

Status: Offline
Posts: 231
Date:

I will 2nd that on the facilities what toys do you have to play with photo's please. I'm in a school we have some nice play things hear but most of its the same stuff that was hear some 45 years ago when I was hear as a kid.

Pug

__________________

 04 250 TTR   1960 Harley panhead  84 Honda xr 250/cb250rs Hybrid plus the new Montesa 4Ride


Clubman B

Status: Offline
Posts: 280
Date:

Nicely done John

__________________


Clubman A

Status: Offline
Posts: 687
Date:

For my sins, I have a small injection mould toolmaking business so have access to some modern machinery, yet I have only just got round to using it on my old bikes...LOL

One part of rebuilding any bike is searching for parts and ebay obviously plays a part in this, what is surprising is the amount of genuine new old stock (NOS) parts that are still available so many years after after these bikes were made. Obviously there's a finite amount of NOS but as an example this bike needed a rebore and I managed to find a reasonably priced genuine BSA +1.0mm oversize piston.

20170607_103355.jpg

20170607_103427.jpg

Other NOS parts I found were a genuine BSA wiring loom, front brake cable & chrome rear mudguard amongst other parts. Considering the last BSA's were made as far back as 1973, I just typed BSA NOS into ebay and it returned over 4,600 items confuse


-- Edited by John Harvey on Wednesday 11th of October 2017 10:14:23 PM

__________________

was it turn left or was it right...ahhhhh


Clubman A

Status: Offline
Posts: 687
Date:

I thought I'd post up some pictures of what this bike is supposed to look like for those not familiar with these Birmingham built trail bikes.

Here's a picture of a restored 1971 BSA B25T in original condition.These BSA & Triumph 250's for 1971 were unfortunately to be the last ever mass produced 250's to be made here in the UK.

BSA+B25+VICTOR.jpg

For a number of reasons BSA got into financial trouble in 1972 and one casualty of this was that the 250's were dropped. For 1972 the B50T were restyled with chrome mudguards and a similar tank stripe paint scheme but used a Candy style of paint that came from the hot rod scene in America. It consisted of a base coat, normally white or silver then a top coat that was a lacquer with a colour mixed the result was a colour that has a depth of gloss to it that looks different in different light...all very 1970's

Here's a couple of examples of the 1972 B50T model

1.jpg

You can see a clear influence on the later XT and TT Yamahas that came along a few years later and especially so as they copied the oil in frame system BSA used on these bikes.

1972 B50T.jpg

I've never been keen on the grey frame colour so decided to build my B25T in the style of the 1972 B50T with a black frame, chrome guards and a candy paint finish.


-- Edited by John Harvey on Tuesday 17th of October 2017 10:29:51 PM

Attachments
__________________

was it turn left or was it right...ahhhhh

TTR


Powermonger!!

Status: Offline
Posts: 7911
Date:

What a great thread - thanks for posting up the photos and info John biggrinbiggrin

Looking forward to seeing the finished bike.

I was looking at a Triumph Trailblazer the other day and your BSA seems to have taken some styling cues from it - or vice versa wink


__________________

Exeter area - Devon TRF Group member

http://www.ttr250.com     

http://ttr250.activeboard.com/ - THE forum for TTR250 owners


Clubman A

Status: Offline
Posts: 687
Date:

TTR wrote:

I was looking at a Triumph Trailblazer the other day and your BSA seems to have taken some styling cues from it - or vice versa wink


 Good ol badge engineering Brian, they are the same as each other apart from the paint scheme, fuel tank shape and of course the badges biggrin I guess a similar scenario with Husky & KTM today?

Here's a couple of pics of the Triumph T25T version and you can see they are very similar.

8625914.jpgPicture 301.jpg 

The crankshaft arrangement on these bikes is unusual in that it has a 1 piece forged steel crank with a plain big end bearing with bolt on cast iron flywheels and a high tensile duraluminium con rod with steel end cap.

 20170204_173356.jpg

This was a known weak area on the original B25 model so for this 1971 model were fitted with a stronger conrod a new oil pump and a better pressure relief valve. It must have helped as this particular engine with 27K miles was standard with a small amount of wear on the crank.

Reassembling the crankshaft.

20170420_150237.jpg

Quick check of the oil pump and all ready for reassembly of the engine.

20151222_111018.jpg


Attachments
__________________

was it turn left or was it right...ahhhhh


Clubman A

Status: Offline
Posts: 687
Date:

As I had the engine apart I checked all the bearings the gearbox bearings seemed to be okay so I replaced the main bearings and camshaft bushes. Whilst heating the cases to fit the new bearings the gearbox output bearing fell out, no problem in that, but once I checked it again as it was out, it felt really rough. On checking it you could see it had worn on one side only, it's obvious once you think how the drive sprocket only pulls on one side because of the drive chain. So the bearing appeared okay as 75% of it was, but the worn part that takes the load was not so good!

Putting the cases back together.

IMG_2069.jpg

Reassembling the rest of the engine was straight forward so I won't bore you with any pictures. especially as there aren't any! I was too busy putting it all back together and forgot to take them! The gearbox was very good so nothing needed replacing other than the dodgy index spring that I polished to help prolong its life, The clutch and primary drive were okay except for the cush drive in the clutch hub, which was completely shot so new parts there and that was it.

thumb_IMG_2126_1024.jpgthumb_IMG_2128_1024.jpg


Attachments
__________________

was it turn left or was it right...ahhhhh


Expert

Status: Offline
Posts: 1219
Date:

Best read I've had in a long while John, sterling stuff !!


__________________

DGTRF                             You're just passing through, make the most of it !    


Clubman A

Status: Offline
Posts: 687
Date:

With the engine done it's time to look at the other parts that need to be fixed and get this bike back together.

I've one original BSA seat and one pattern seat the trouble is the original seat is for a less common version with a 2" longer tank that was made in low numbers, BSA modified the seat by taking 2" off the front of the steel seat pan and cutting a 2" strip of foam from the centre section and gluing together to make the seat shorter. The pattern seat has the correct base but the seat foam is just cut from a block of foam and shapeless whereas the BSA foam is moulded shape so I will use the original foam but put a 2" strip back where BSA removed it originally.

Shortened, cut & glued BSA seat compared to pattern plank of foam.

20170316_205859.jpg

New centre section added with a thin strip of foam to go on the top.

20170419_200928.jpg

One area where this bike tried to break new ground was with silencing on both the inlet and the exhaust. The air box was specially designed to keep the noise down with a large air filter and the exhaust was a reverse flow type rather than the standard straight through absorption type. The silencer box is quite bulky and is fitted with two heatshields the main one being polished perforated stainless steel and something that caused controversy when launched, although I'm used to it so it doesn't bother me, it is fairly effective at doing its job though! The problem with the silencers is that they can and do rot out the one I had wasn't too bad, it needed a small amount of welding and a coat of paint and was good to go.

 Silencer box before restoration.

20170222_203055.jpg


-- Edited by John Harvey on Sunday 29th of October 2017 08:17:41 PM

Attachments
__________________

was it turn left or was it right...ahhhhh


Expert

Status: Offline
Posts: 1941
Date:

Excellent work John and a very good, detailed thread.
You will certainly enjoy riding it now that you know it's been done O.K.
The number of times I've done the same to my T100 since buying it as a wreck in 1966 is legion - and I still love it.
I'm sure yours will give ytou good service as well. wink

Martyn


__________________

You're never too old to learn something stupid.

TTR250 but now a mobility scooter
Budleigh Salterton


Clubman A

Status: Offline
Posts: 602
Date:

The engine looks a bit similar to an old C15 that I had to go to school on very many moons ago (late 70s) . Mum used to hear me coming home two valleys away and put the kettle on.

The rest of my pals were on  FS1e's and similar but I was proud of my old bike (had a D7 bantam too).

Happy days - love the write up on the restoration- great reading-


Mike


__________________


Clubman A

Status: Offline
Posts: 687
Date:

Hi Martyn, I'm certainly building this one to use and for keeps, really good to hear about your T100 inspiring stuff. Hi Mike, you are right about the similarity with the C15 as this bike is the final development of the C15, same bore and stroke but I don't think there's a single engine part that's common between them.

My interest in this model of BSA goes all the way back to that glorious summer of 76, a guy who lived just up the road had just bought one and as he worked nights it would conveniently sit outside his house in the daytime meaning I got to feast my eyes on it twice a day as I made my way to and from school. I think I could have burnt the image of that bike onto the back of my eyes, I really liked seeing that bike 10 times a week, I was mad about bikes back then and as a thirteen year old I saved enough money from a part time job to buy a BSA C12 I couldn't ride it anywhere though... that just seemed like a mere detail back then confuse

At that time my older sister's boyfriend had a nearly new T140V Triumph Bonnevilles that seemed to go wrong now and then, unfortunately he knew even less about bikes than I did, so he used to let me work on it. He didn't have a workshop manual for it, so when we hit problems and were unable to fix it I'd wait until the next day after I'd had a chance to refer to my font of all motorcycle mechanical knowledge and fix it the next day, I will tell you  this secret below, its been a while now so I'm less embarrassed to admit this disbelief 

Back to the bike rebuild, things are coming along really well now. With British bikes of this age there are many parts that are common with other models, things like most of the electrics, carbs and instruments. You may recall from earlier how many miles this engine had done, unfortunately I had "borrowed" a few parts from this bike over the years it was apart and one of them was the speedometer. I managed to source a replacement Smiths speedometer and although it had a different ratio and a different dial face it's not a problem as they are all essentially the same, so I was able to get this wrong one rebuilt as the right one.

Earlier Speedometer core for rebuild to later style.

Old speedo.jpg

If you have ever done anything up you will know that some parts that didn't look too bad when you started may look worse when sat next to something freshly painted. For me this meant a number of steel parts that were once zinc plated were looking a bit rusty. I thought I'd give one of the home zinc plating kits a go and have to say that I was really pleased with the results, if you look at the earlier picture of the painted wheel hubs you can see the front wheel spindle I plated.

Here's a small seat clip I did first that shows really well the before and after of the zinc plated finish.

20170329_155040.jpg


-- Edited by John Harvey on Thursday 2nd of November 2017 11:47:31 PM

Attachments
__________________

was it turn left or was it right...ahhhhh


Clubman A

Status: Offline
Posts: 687
Date:

Here is my secret workshop manual, one that 13 year old boys can learn to fix 750cc motorbikes with...it's true, there's even a sample page here.
Cheers John


-- Edited by John Harvey on Thursday 2nd of November 2017 11:33:24 PM

Attachments
__________________

was it turn left or was it right...ahhhhh

TTR


Powermonger!!

Status: Offline
Posts: 7911
Date:

John Harvey wrote:

If you have ever done anything up you will know that some parts that didn't look too bad when you started may look worse when sat next to something freshly painted. For me this meant a number of steel parts that were once zinc plated were looking a bit rusty. I thought I'd give one of the home zinc plating kits a go and have to say that I was really pleased with the results, if you look at the earlier picture of the painted wheel hubs you can see the front wheel spindle I plated.

Here's a small seat clip I did first that shows really well the before and after of the zinc plated finish.


What plating kit did you use John? The results look impressive biggrin 


__________________

Exeter area - Devon TRF Group member

http://www.ttr250.com     

http://ttr250.activeboard.com/ - THE forum for TTR250 owners


Clubman B

Status: Offline
Posts: 280
Date:

Excellent!
Good point about the plating, too

__________________


Clubman A

Status: Offline
Posts: 687
Date:

Brian, I used one from here www.classic-plating.co.uk/ rather than use a battery I managed to borrow a DC power source which gave some fine control, it was still a bit hit or miss at times. I also found a wire wheel mounted on a bench grinder the quickest and easiest way of preparing parts. It's a bit of a flaff doing this and you obviously have to follow all of the H&S side of things but I think the results are impressive.

__________________

was it turn left or was it right...ahhhhh

TTR


Powermonger!!

Status: Offline
Posts: 7911
Date:

I bought and use the Gateros kit - see here 

As you say, the results can be variable and plating requires a lot of patience. I sometimes have multiple attempts to get a good finish.

My most recent attempts have been on a TTR250 carb and, with perseverance, I got some results that I was happy with. 

If you get bored, the thread is here.

Brian


__________________

Exeter area - Devon TRF Group member

http://www.ttr250.com     

http://ttr250.activeboard.com/ - THE forum for TTR250 owners


Expert

Status: Offline
Posts: 1620
Date:

I got bored and watched it!!!!
You are wasting my time Mr Sussex.
Nice job though, Tiger needs an awful lot of "Passivating".
Or is that Passify? ;)

__________________


Clubman A

Status: Offline
Posts: 687
Date:

At last... after many, many weeks it's now time to start putting the cycle parts back together with what seemed like ages of searching for parts and cleaning up both the original and the replacement parts I'd finally got to a point where there's nothing left to do other then to start bolting it all back together!

At this stage it's tempting to show lots of pictures of brackets and stuff but that's all rather dull as they all look a bit meaningless on their own. In the same vein as the engine I got stuck into it before I remembered to take any pictures no

The frame had been repainted many years ago and was still in very good condition so it was a case of fitting the new steering head bearings outer races into it and giving the oil in frame a clean inside. The forks and swinging arm all fitted easily along with the reconditioned tail light assembly, grabrail and new old stock rear mudguard and the recovered seat tried for size.

IMG_2087.jpg


IMG_2089.jpg


IMG_2091.jpg

Next up were the wheels. For some reason BSA used a 20" non standard front wheel the only option these days is to go up in size to a standard 21", to help counter this increase I also went for 1" longer Hagon rear shocks. The front brake was originally a 6" single leading shoe brake for the trail models the UK road version had a 8" twin leader laced to an 18" rim. I had one of the larger brakes so took that along with the rear hub just up the road for some top quality stainless steel rims with stainless spokes from the Devon Rim company.

Here are the newly built wheels loosely fitted and sat alongside it is the fully repaired aluminium tank that is now back to its former glory smile

IMG_2096.jpg


Attachments
__________________

was it turn left or was it right...ahhhhh


Clubman A

Status: Offline
Posts: 687
Date:

You might of noticed in some of the previous pictures an aluminium box with some side reflectors that sits just below the petrol tank. It's an item unique to these models and is a classic case of a solution looking for a problem.

The thinking was to put all of the major electrical items into a one box so in there is the charging control, ignition coil,  flasher unit etc there is also a plug & socket that goes to the headlight so you can simply unplug and remove the headlight assembly? Useful... not really and in the event of an electrical problem a pain in the ass as access is poor, it does house a large capacitor that allows the bike to be kick started with either a flat battery or no battery at all. There is also the issue that the bike has three separate (small) wiring looms, there's one inside the electrical box linking everything together, another that goes to the headlight and then the main loom itself. The fact that this idea was never copied says it all really.

I managed to get hold of an original new old stock braided wiring loom as the original was a mess and some of the mounting brackets I found online from the states. 

thumb_IMG_2112_1024.jpg


-- Edited by John Harvey on Sunday 5th of November 2017 10:20:25 PM

Attachments
__________________

was it turn left or was it right...ahhhhh


Expert

Status: Offline
Posts: 1555
Date:

Looking good John
Just started the final build on mine.

__________________

Politicians are like nappies. They need changing often, and usually for the same reason.


Clubman A

Status: Offline
Posts: 687
Date:

Cheers Ian, looking forward to hearing about your rebuild mate smile

It's a landmark to get the tyres and wheels fitted...because

thumb_IMG_2120_1024.jpg

...for the first time, in a very long time, it can finally start to look more like a (motor?)bike smile

thumb_IMG_2119_1024.jpg


Attachments
__________________

was it turn left or was it right...ahhhhh


Devon's Best

Status: Offline
Posts: 2480
Date:

Very nice job, will be a shame to get it dirtywinkwink


__________________

totallyttrs.com


Clubman A

Status: Offline
Posts: 687
Date:

Cheers Steve, yes it would be a shame to get it dirty, but a bigger one not too smilesmile If you doing your Air Ambulance Santa charity run this year give me a shout & I'll try and get along on.

Next up is fitting the engine.

Da daa..it still fits biggrinbiggrinbiggrin

thumb_IMG_2135_1024.jpg

I needed a new exhaust down pipe and the only ones that are guaranteed to fit really well are the original BSA ones. BSA had a deserved reputation for some quality control issues towards the end  but one thing they rarely got wrong was parts that were fitted whilst on the assembly line (they just fall off laterno). The exhaust pipe follows the shape of the engine really well and then neatly tucks in behind the frame, it looks like a complex shape to get right a poor fitting pattern down pipes can be found for around £50 yet a good original one, like the one I found below, cost £80 and yes it did fit perfectly smile

thumb_IMG_2136_1024.jpg


-- Edited by John Harvey on Wednesday 8th of November 2017 01:26:49 PM

Attachments
__________________

was it turn left or was it right...ahhhhh


Expert

Status: Offline
Posts: 1555
Date:

Ahhh.... £80 cry If only my new one was that price I would be happy. Sadly not !
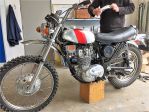
The pipe looks really good in black John. 


-- Edited by grouty on Wednesday 8th of November 2017 05:28:21 PM

__________________

Politicians are like nappies. They need changing often, and usually for the same reason.


Clubman A

Status: Offline
Posts: 687
Date:

Yes, but yours has a CCM part number so that will double its price smile 

The paint is a high temperature metallic black paint for a woodburner?

An odd thing about these oil in frame bikes from this era is that there's probably more of them here in the UK now than when they were new! Back when this bike was new BSA/Triumph used to export 80% of everything they made to the USA, since from around the mid 1980's there has been a steady stream of these bikes being brought back that is still going on! Back in the early eighties I went along with a friend to look at a BSA Starfire for someone he knew, low and behold the seller also happened to have a non-running B25T in his garage which my friend ended up buying. By then I had passed my test and had my very own Triumph T140V...living the dream at last smile Forward a year and with my Bonny in need of a rebore and no other transport my friend offered me the loan of his B25T. For a bike mad teenager going backwards from a 750 to a 250 was on the face of it a step in the wrong direction, it wasn't. For some reason this bike ended up running really really well and the few weeks I spent riding this bike I have really fond memories of, it was just a nice bike to ride.

Many years later and having sold my main bike to start a business and a few more years later on I spot an incomplete Victor 250 for sale and is the bike you see here.

Nearly there! tank painted and on, side panels about to be fitted

thumb_IMG_2148_1024.jpg

Overhauled clocks fitted.

thumb_IMG_2150_1024.jpg

Finally ready to get it started!

thumb_IMG_2155_1024.jpg


-- Edited by John Harvey on Thursday 9th of November 2017 09:58:38 PM

Attachments
__________________

was it turn left or was it right...ahhhhh


Expert

Status: Offline
Posts: 1555
Date:

Stunning John


__________________

Politicians are like nappies. They need changing often, and usually for the same reason.


Expert

Status: Offline
Posts: 1941
Date:

Brilliant, John - it really looks "the dog's danglies" and very attractive.

I spy the tradional Brit Bike drop of oil too.  bleh

Martyn


__________________

You're never too old to learn something stupid.

TTR250 but now a mobility scooter
Budleigh Salterton


Expert

Status: Offline
Posts: 1397
Date:

Great looking restoration,
Dry day bike..?
Mike..

__________________


Clubman A

Status: Offline
Posts: 687
Date:

Well spotted Martyn, they all like to mark their territory no

Mike, I'm hoping it will be an all year bike, there are people using far more valuable cars on race tracks and hill climbs and after all, I know how to repair this one smile

Some outdoor shots before the MOT...it did pass confuseconfuseconfuse

thumb_IMG_2158_1024.jpg

thumb_IMG_2159_1024.jpg


Attachments
__________________

was it turn left or was it right...ahhhhh


Expert

Status: Offline
Posts: 1506
Date:

I really like that, good job.  How useable are bikes like these in the lanes? I've never ridden one, I swapped my Fsie for a C15 T but couldn't get it to run so gave up and bought a DT 250, wish I had kept both of them.


__________________
TTR


Powermonger!!

Status: Offline
Posts: 7911
Date:

Saw one at the NEC Classic Motor Show today John but it was nowhere near as well restored as yours. Also a rough-looking Triumph version with bits missing for sale at £1,750....

Brian


__________________

Exeter area - Devon TRF Group member

http://www.ttr250.com     

http://ttr250.activeboard.com/ - THE forum for TTR250 owners


Clubman A

Status: Offline
Posts: 687
Date:

Trevor, I've only done a few local lanes on it and so far so good, 1st gear seems a bit tall so perhaps a smaller front sprocket? The engine is really willing & although it lacks a bit of torque low down, it revs out well and  pulls incredibly well for an old bike, it's not like a traditional Brit bike in that it's revvy, max power is at 8250, redline at 8500.  I should have a better idea of how good a trail bike it is as I'm hoping to be getting out for a full days riding on it soon smile


__________________

was it turn left or was it right...ahhhhh


Clubman A

Status: Offline
Posts: 687
Date:

For anyone interested here in these final BSA models I can highly recommend this book called 'BSA Motorcycles The Final Evolution' written by Brad Jones HERE not a bad xmas pressy if you're into Brit bikes & stuck for ideas idea.gif


__________________

was it turn left or was it right...ahhhhh


Expert

Status: Offline
Posts: 1941
Date:

John, where I used to dwell - oop Norf - there is a VMCC group called Reivers and they are based near Ashington.

One of their members shows on their web site in their Gallery a picture of his Victor.

Christmas Eve 2014 Bimble, Chollerford Area 005.jpg

The caption is "24th Dec, 2014: BSA Victor.on an unsurfaced, unclassified road, near Chollerford.  Photo: Chris Maughan."

Obviously still being used and in a place where it was built to be used.

Just thought you'd like to know.  smile

Martyn


-- Edited by Cubber on Wednesday 29th of November 2017 10:31:15 PM

__________________

You're never too old to learn something stupid.

TTR250 but now a mobility scooter
Budleigh Salterton


Clubman A

Status: Offline
Posts: 687
Date:

That looks like a nicely put together and practical trail bike Martin, it's the bigger brother to my bike as it is a B50T, which it the 500cc version although it is similar in many ways apart from the bigger capacity. Its probably got a steel tank as well for that tank bag to work smilesmilesmile


__________________

was it turn left or was it right...ahhhhh

Page 1 of 1  sorted by
 
Quick Reply

Please log in to post quick replies.


Create your own FREE Forum
Report Abuse
Powered by ActiveBoard